Monday, February 29, 2016

Spektrum DX7S > Backlight Mod


Tested okay


INCORRECT:
Clearance backlight panel to buttons.


Editted instructions for backlight install
(from https://youtu.be/KVazmkjIqPE)
  1. Open case by peeling rubber covers and grips, to access six screws
  2. Remove SD card, and sd card board
  3. Negative source from battery board, on battery case side
  4. Positive source from vibe motor.
  5. On backlight kit connector:
    1. Opposite from black wire is #1
    2. #2 is positive
    3. #3 is negative
  6. Remove vibe motor
  7. Remove LCD board
  8. Trace LCD (edges) to LCD card reference
    1. (Measure LCD height = 9.7mm, 1.5mm protrude from edge)
  9. Remove LCD, and from brackets
  10. Install foam tape on LCD card.  
  11. Install backlight to LCD.  
    1. Good spacing to buttons, opposite end clearance with mounting screws
    2. Backlight wires opposite vibe motor
    3. Black backlight wire is DOWN
  12. Tape on LCD two edges, and backlight edges
  13. Install LCD to backlight kit
    1. Use mounting screw holes to center
    2. Watch for protrusion.
  14. Reinstall LCD broad, reconnect.
  15. Reassemble all.

Tuesday, February 23, 2016

Mini Quad Build > Cleaned Up ESC Wiring


Cleaned up ESC wiring by directly solder motor wires to ESC, which involved cutting and exposing nice ESC shrink wrap.
Re-shrink wrapped only bottom half to keep ESC LED's uncovered.
Removed ESC mounting pad.

Total vehicle weight savings = ~1g


Mini Quad Build > Indoor FPV Test Flight


Setup:
Diatone Blade 180
DYS BX1306
Afro 20A Race SimonK (OneShot enabled)
CC3D Atom with DRonin (Autotuned Tau = 20.40 as flown)
3s 850mah
ET200 VTX
600TVL 1/4 1.8mm CMOS 170deg camera
AUW = 235g

Eachine RC832 VRX
UTV700 EasyCap USB video capture


Thursday, February 18, 2016

X5SC Quad > Battery Upgrade


The X5SC actually has a cavernous battery compartment for the small 1s 500mah battery.  This is different from the X5C battery compartment, as it opens from the rear to allow mounting the camera under the body.


The stock battery weighs 16g and measures 42mm x 24mm x 9mm


This is a good upgrade:
https://www.hobbyking.com/hobbyking/store/uh_viewItem.asp?idProduct=33258
(Supposedly only 6g !?!?!)

Update 2/23/2016:


However, does not fit inside completely to close the door.


Wednesday, February 17, 2016

X5SC Quad > Radio Antenna Mod


 Open up the radio case....


Saw off the nub for larger diameter antenna.


Unsolder the stock antenna.

Resolder the RPSMA antenna wire, along with the ground shield.


Stock antenna compared to big dipole antenna.


1/4" washer to hold the connector in place.


Viola!!! Big antenna mod!

Monday, February 15, 2016

Mini Quad Build > AUW Weight (850mah Batt)


With 850mah battery


Roughly, below is the updated spreadsheet weights:


Descriptions
QtyUnit Weight gTotal Weight g
DTI Blade 180 Frame
12424
DYS 1306 3100KV motors
41352
AFRO RACE MINI 20A ESC
410.742.8
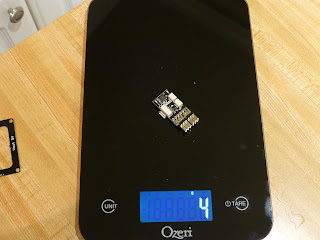
CC3D ATOM Flight Controller PCB only144
OrangeRX R111XNNano Satellite RX11.41.4
Micro FPV camera 600TVL133
FPV Video TXEachine ET200
(No Coax Connector)
155
Vid TX Antenna (Clover)(No Coax Connector)155
FPV TX Harness
111
Batt 3s 850mah3s 850mah17777
Diatone BullNose 4x4.5 (Pair)
2714
Velcro Strap
122
CC3D MountPrinted133


234.2


Mini Quad Build > FPV VTX Antenna Solder

Easiest way to remove coaxial connector from VTX is to hacksaw the tabs and lead of the connector at the PCB and careful not to cut into the PCB too much.
Desoldering wick and desoldering pump did not work well, as there are four soldered ground tabs and these tabs cannot be simultaneously desoldered at once.

Coaxial connector removed on the cloverleaf antenna end and soldered to front of VTX.  The cable shield are split to two grounds on front.  The center coaxial core is carefully soldered to the signal tab.

A piece of desolder wick served as braid wire is used to make a ground brace for the back of VTX connection. 
Thus all four ground pads are used on the PCB.

The brace on the back of VTX serves as extra structure to hold the cantilevered cloverleaf antenna.


Saved ~5g by removing the coaxial connectors!


VTX mounts on back of quad with foam pads cushioning the carbon frame edges.


Thursday, February 11, 2016

Mini Quad Build > Making Weight (big battery, no FPV gear)


With an oversize (1300mah) battery, at ~16g over expected battery, this build should come in at ~245g AUW, including with the VTX & Cloverleaf antenna.


GCS and CC3D linked up and successfully performed initial settings.

The Quad did manage to take off in the air!!!

Wednesday, February 10, 2016

Mini Quad Build > CC3D Atom Mount / OrangeRX Satellite R111XN


CC3D Atom with the 3.3v source for the satellite RX power source.
Epoxy wire strain relief.

Ground pad next to 3.3v left open for future bootloader flash jump.


CC3D Atom in the STL printed mount from Ebay.  STL mount required "working the plastics" to make fit.  Cutoff already there for 3.3v wire!
 
Note to self on STL PCB mounts: relieve all sharp inner corners.


OrangeRX Satellite with "test length" harness. Shorten later for correct length.

Saturday, February 6, 2016

Mini Quad Build > CC3D Atom Mount


CC3D Atom Mount from someone printing on Ebay. 
(Have not test fitted the PCB yet.)

This is about same as the original CC3D Atom case:


But there is now a mounting solution on the 30.5 x 30.5 pattern.


Mini Quad Build > FPV Camera Install


FPV camera glued with epoxy to top plate.  Also wires epoxied for strain relief.


Weight is coming in slightly less than predicted.