Friday, March 11, 2016

Mini Quad Build > AUW Update


MY BUILD1


Descriptions
QtyUnit Weight gTotal Weight g
DTI Blade 180 Frame
12424
DYS 1306 3100KV motors
41352
AFRO RACE MINI 20A ESC
410.742.8
CC3D ATOM Flight Controller PCB only144
OrangeRX R111XNNano Satellite RX11.41.4
Micro FPV camera 600TVL133
FPV Eachine ET200 Video TX(No Coax Connector)155
Vid TX Antenna (Clover)(No Coax Connector)155
FPV TX Harness
111
Gemfan 4x4.5 (Pair)
23.697.38
Velcro Strap
122
CC3D MountPrinted133
Batt 3s 850mahNanotech 45-90C076.200
Batt 3s 800mahTurnigy 40-50C0710
Batt 3s 1300mahZippy Compact 25C193.2593.25
mini OSDwith harness133

FLUFF

1.13


247.96


The Gemfan props are significantly lighter than BN.  They seem to fly smoother than the BN's, probably because the smaller lower torque 1306 motors like less torqy props.


The dry weight is approaching ~150g!


Wednesday, March 9, 2016

X5SC Quad > "Clean Up" Mods

"Clean Up" Mods


Resolder upgraded antenna wire, thru the hole, to be more robust.


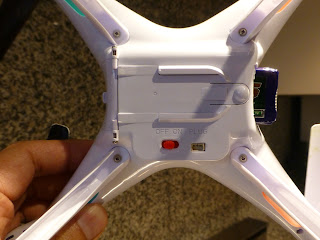
Tape up the battery protrusion, so battery don't fall out.


AUW: 950mah battery, no guards


Sunday, March 6, 2016

Mini Quad Build > Detailed "Lower Deck" Pics


The "Upper Deck" with FPV cam, OSD, and harness.  (VTX is not included.)


Total weight minus battery pack


Saturday, March 5, 2016

Mini Quad Build > FPV MWOSD Build & Test Flight


Test flight with MWOSD on micro minimOSD.


All solder connections, for weight savings.
Upper "payload" deck weight.
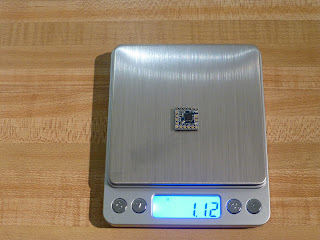
In total, ~3-4g for OSD plus wiring.


Without OSD
(old scale)


With OSD installed
 (new scale)
(OSD + wiring = ~3g.)


Software Setup Summary

  • Download and install FTDI drivers
  • Download and install Arduino IDE
  • Download and unpack MWOSD software
  1. Load MWOSD sketch on Arduino IDE
    1. Uncomment hardware "micro osd"
    2. Uncomment "Cleanflight" FC
    3. Upload to OSD
  2. Load MWOSD_GUI.
    1. Upload fonts
    2. Set options
    3. Calibrate battery settings.
  3. Setup DRonin on CC3D
    1. Modules > Enable MSP Telemetry
    2. Config > Main Port > MSP
    3. Telemetry speed 115200


X5SC Quad > Battery Upgrade Solution

Last time from:
http://extracurricularengineer.blogspot.com/2016/02/x5sc-quad-battery-upgrade.html

950mah battery too big to fit in X5SC.

Solution:

 Cut big hole in front of body
 Big battery is this big!
 Sticks out a bit in front.


Battery door now closes!

Monday, February 29, 2016

Spektrum DX7S > Backlight Mod


Tested okay


INCORRECT:
Clearance backlight panel to buttons.


Editted instructions for backlight install
(from https://youtu.be/KVazmkjIqPE)
  1. Open case by peeling rubber covers and grips, to access six screws
  2. Remove SD card, and sd card board
  3. Negative source from battery board, on battery case side
  4. Positive source from vibe motor.
  5. On backlight kit connector:
    1. Opposite from black wire is #1
    2. #2 is positive
    3. #3 is negative
  6. Remove vibe motor
  7. Remove LCD board
  8. Trace LCD (edges) to LCD card reference
    1. (Measure LCD height = 9.7mm, 1.5mm protrude from edge)
  9. Remove LCD, and from brackets
  10. Install foam tape on LCD card.  
  11. Install backlight to LCD.  
    1. Good spacing to buttons, opposite end clearance with mounting screws
    2. Backlight wires opposite vibe motor
    3. Black backlight wire is DOWN
  12. Tape on LCD two edges, and backlight edges
  13. Install LCD to backlight kit
    1. Use mounting screw holes to center
    2. Watch for protrusion.
  14. Reinstall LCD broad, reconnect.
  15. Reassemble all.

Tuesday, February 23, 2016

Mini Quad Build > Cleaned Up ESC Wiring


Cleaned up ESC wiring by directly solder motor wires to ESC, which involved cutting and exposing nice ESC shrink wrap.
Re-shrink wrapped only bottom half to keep ESC LED's uncovered.
Removed ESC mounting pad.

Total vehicle weight savings = ~1g